Tutorials
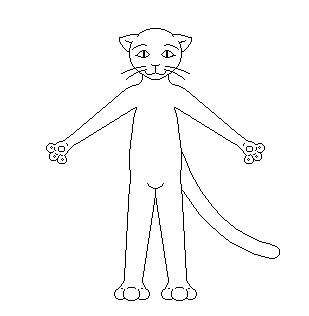
Here is a simple creature I did completely in MSPaint, drawn completely with a mouse :) Some of you might be saying, "Wow, that's so impossible!" but really, it's not that hard ^_^ You just have to be patient and know a little bit about what you're doing. So, let's get started!
First of all, open up MSPaint. You should find it by going to Start, then Programs, then to Accessories. It should be right down there somewhere. If you can't find it, then go back to Start, then to Search, and then to For files or folders :) Then, just type in MSPaint and click enter. If you can't find it like that, then you probably don't have it on your computer. In that case, check out the Links for a free and easy program you can use ^_^
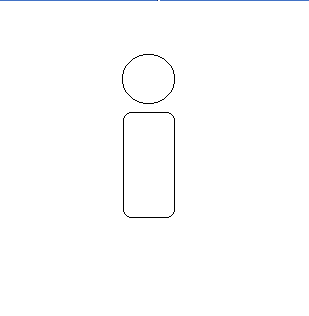
If you do have MSPaint,t hen great! Let's keep going! Open up Paint and drag the right bottom corner until you have a white square about the size you want your critter. It's alright if you have too much or too little. You can always make it bigger or smaller if you need to. Now, go to the cirlcle option down on the side and make a circle for the head of your critter :) Like this:

Simple stuff, huh? Let's keep going then. From here, get out the Rounded Rectangle tool (it's next to the circle :)) and draw a rounded rectangle next to, or underneath the circle. If you put it below, then the critter will be sitting or standing up on two legs, but if it's beside the head, the critter will be laying ot standing on four (or six ;)) legs. It's up to you what you do, but I went with underneath.
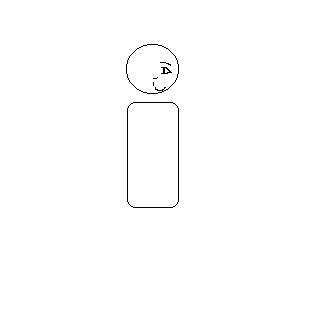
The next thing I like to do is to draw in half of the face (Note: If you're drawing a critter with the rounded rectangle to the side of the head, you should not draw half, but all of the creature :) The draw only half trick only works if your creature if facing straight). Get out the pen tool and just draw a simple face. Ir doesn't matter if it's perfect, because you're going to have a chance to play with it and make it nice and neat later on. I'm not sure why I start with the face, but it seems to always help get the whole picture started and helps decide what kind of creature it will be :) Also, you'll see why only haf a face in a few more steps.
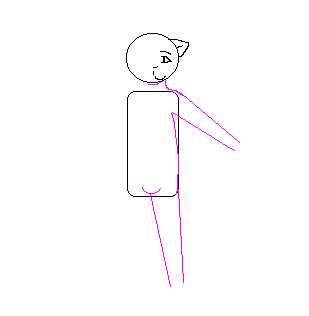
From here, you should pick a new color, like bright pink or blue, so that you can tel the difference between the base, or skeliton and the outer lines. This helps a lot when you're cleaning up the picture at the end. Try drawing a chin for the creature, or a long muzzle :) Maybe they have a strange teardrop shaped head, or even something silly like a star! Remember, you don't have to be perfect, because you can always change it and make it better later on. Draw curved lines from the head to the body for a neck. Use the line tool (under the airbrush) to make the arms and legs. You can either draw the torso with the pen tool, or you can use the Curve tool (next to the line tool) if it helps you out. To make the croch *snickers* i used the circle tool and just erased the top half.
Now it gets a little hard. Drawing hands, feet, toes and fingers can seem really hard for some people, so I tried to do it in a simple way that almost anyone can do :) I used the circle tool to make toes and fingers, plus the palm of the hand, for this critter. I went ahead and drew in the foot so it looks like a foot, but I left the hand untouched so you can see what I did :)
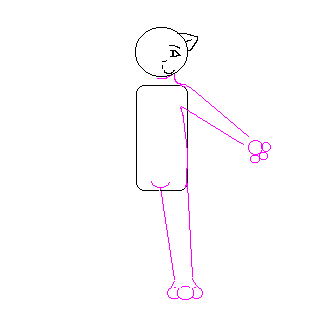
I kind of, accidentally, added two or three steps into one here, so I'll explain them all as I go :) Draw lines from the big circle that makes the palm of the hand to the lines of the arm. Also, erase some of the lines in and between the fingers and the palm so that it looks more hand like. I usually leave a shart line between the arm and the palm, and the palm and each finger, so that it doesn't look like one big blob ^_^ Also, since it's a kitty, I added little circles in the hand to look like the pads on the bottom of the kitty's feet.
Also in this step, because I'm silly, went ahead and made a tail for the kitty with the curve tool and made the tip of the tail with the circle tool :) After I did that, I went ahead and copied the half of the kitty that I'd drawn with the select tool. Then, what you want to do is look down below the tools. You'll see two images with a circle,square and cylinder in them. Click on bottom picture, and make sure that you have white as your second color choice. This is so that when you paste, all the white around the image won't show up and you'll be able to put it in there the way you want to. Now, paste the image in, then go Image, then to Flip/rotate. Make sure that the Flip horizontal circle is clicked, then click on ok. :) Then you can just move the half of the kitty into place.
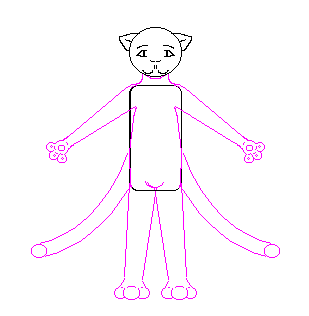
You're probably thinking, "That looks really stupid, I don't like it!" and want to delete all of your hard work. But don't! You're only half finished. Get the paintbrush tool out, make the brush size the smallest it can get, and start brushing out those black lines. Also erase or brush out and extra body parts, like the second tail.
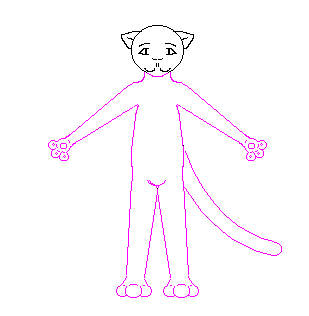
I know, you're thinking, "But it still looks silly." Yeah, it does look silly, doesn't it? But that's ok! Like I said, it's very fixable :) As you can see, the face of my kitty is too far apart. So I took the Freeform select tool (the very first one) and drew around one half of the face and pushed it over a couple pixels. Then I did the same thing to the otherside. It still looked silly, so i took my paintbrush tool and began drawing with it a little bit to try and make the face look a little better. He looked cross eyed, so I connected the line of the eyes, pushed the eyes apart a little, and gave him new eyebrows :) Plus, I put his mouth closer together and his nose down a little bit. Much better!
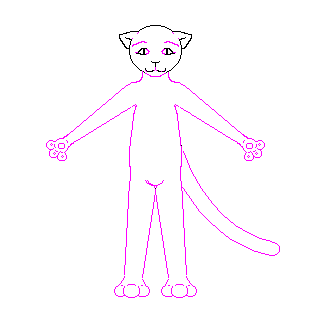
Now that you have the critter the way you want it, you can start "cleaning", or as I like to say it, shaving pixels off. You certainly don't have to do this, but I, personally, think it makes it look much neater and cleaner in general. It's fairly simple. Just go alone with a pen, paintbrush or eraser, and take off and pixels (those little squares) that touch or overlap.
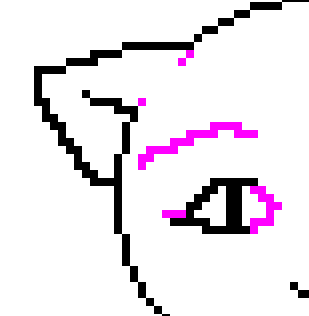
When you're all done, take the eraser tool (beside the fill color tool), pick the pink or blue ot whatever color you chose to draw in as your first color choice, and black as your second color choice. Then, hold in the right mouse button and go along the other color to make it all black :) I also added some whiskers with the curve tool for this kitty. Once you do all that, then you're finished with the line art and ready to color!


This site has been visited